Getting Started (Isolated Worker Process Azure Functions)
Configuration
In order to add the Server Timing API support to an application a required service and middleware must be registered. The library provides extensions which make it really simple.
var host = new HostBuilder()
    .ConfigureFunctionsWorkerDefaults(workerApplication =>
    {
        workerApplication.UseServerTiming();
    })
    .ConfigureServices(s =>
    {
        s.AddServerTiming();
    })
    .Build();
Options can be set when registering the middleware - e.g. to set URLs that are allowed to see values from timing APIs (which would otherwise be reported as zero due to cross-origin restrictions).
var host = new HostBuilder()
    .ConfigureFunctionsWorkerDefaults(workerApplication =>
    {
        workerApplication.UseServerTiming(new()
        {
            AllowedOrigins = new List<string> { "https://tpeczek.com", "https://developer.tpeczek.com" }
        });
    })
    .ConfigureServices(s =>
    {
        s.AddServerTiming();
    })
    .Build();
Adding Metrics
In order to add timing metrics values for current request the instance of the IServerTiming service should be obtained (it's a scoped service). Once that is done, the values can simply be added to metrics collection.
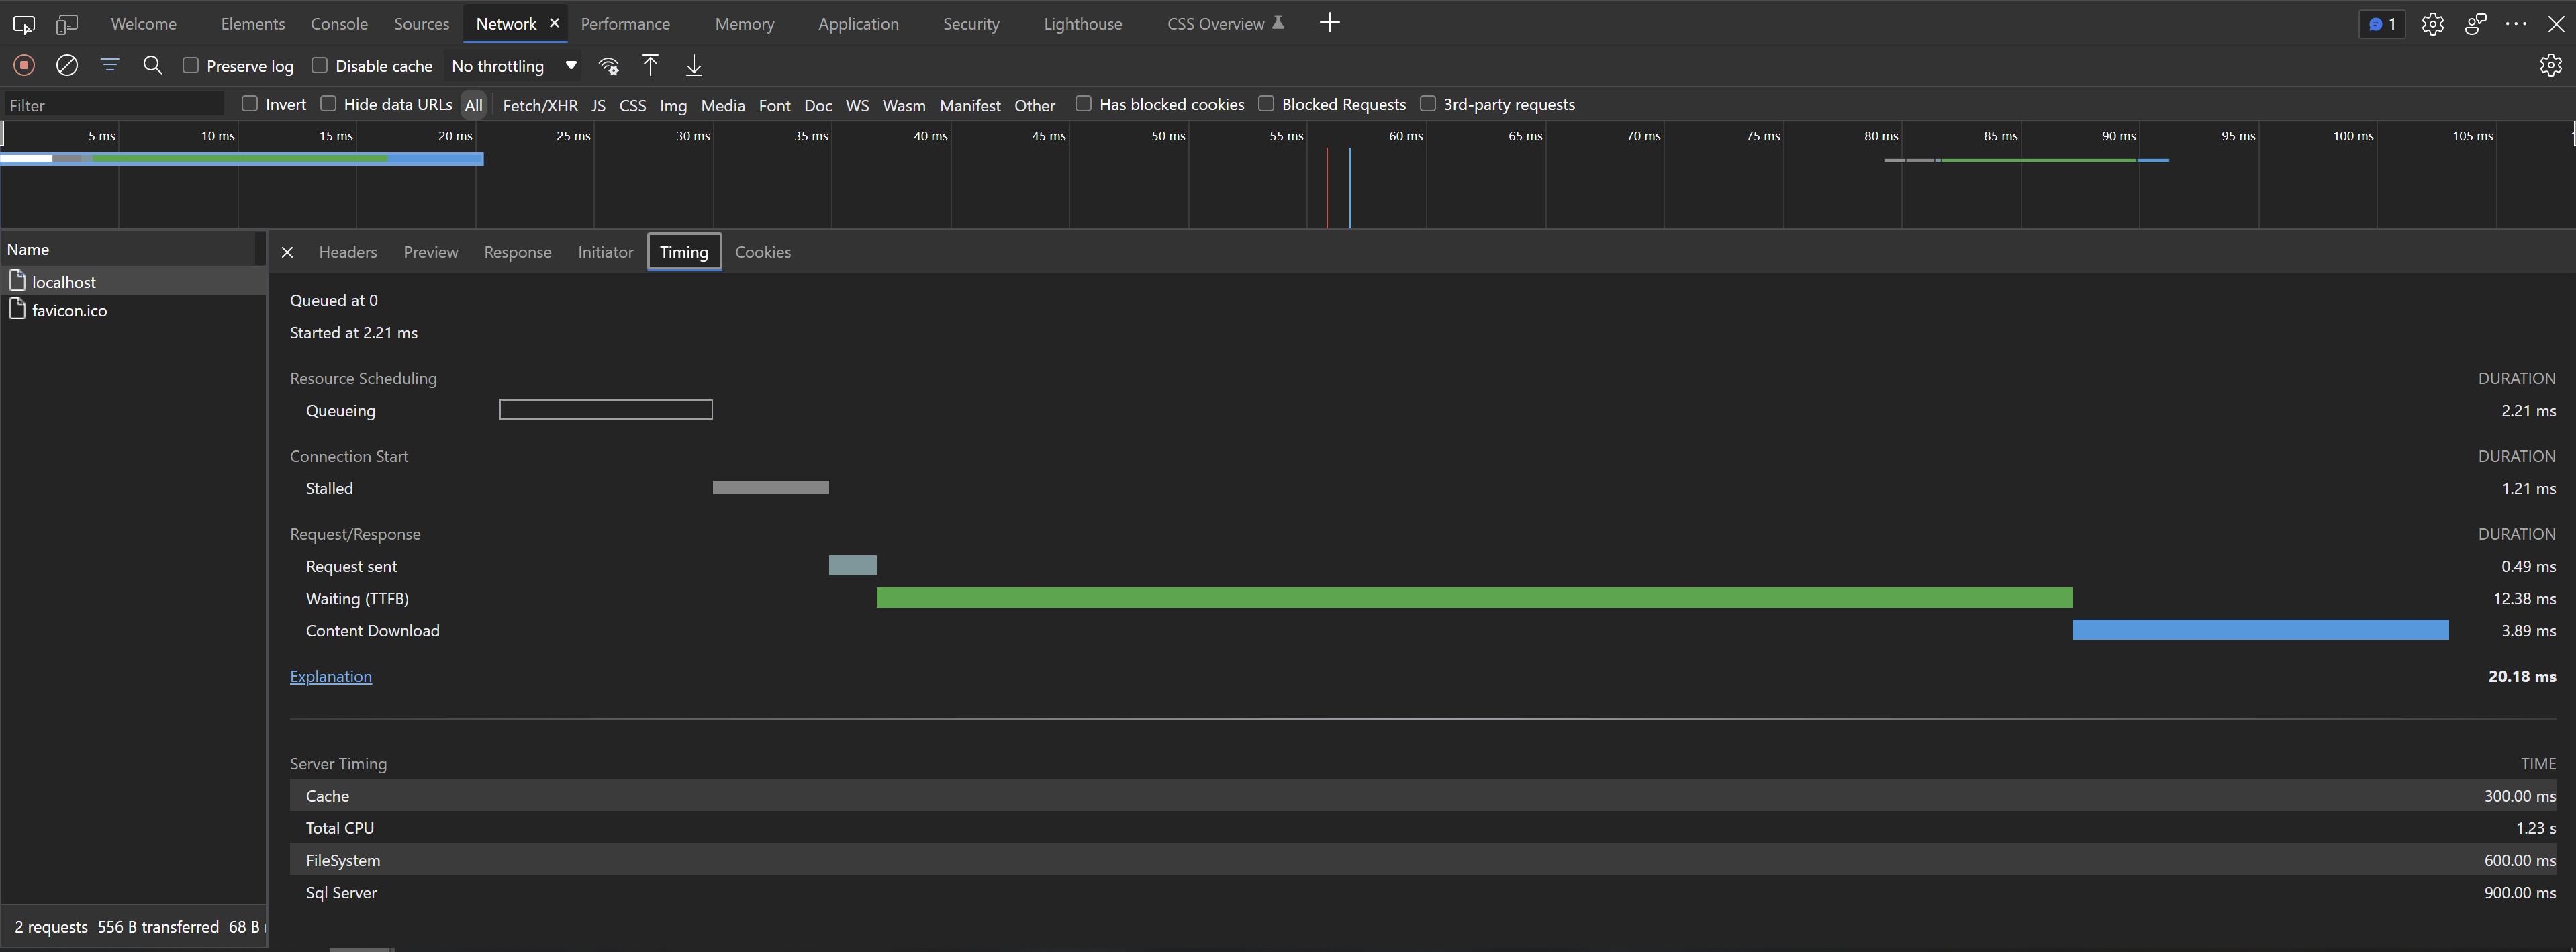
serverTiming.Metrics.Add(new ServerTimingMetric("cache", 300, "Cache"));
serverTiming.Metrics.Add(new ServerTimingMetric("sql", 900, "Sql Server"));
serverTiming.Metrics.Add(new ServerTimingMetric("fs", 600, "FileSystem"));
serverTiming.Metrics.Add(new ServerTimingMetric("cpu", 1230, "Total CPU"));
The values will be available in Server-Timing header, which browsers can visualise.